Registries
Registries are used to store subjects (individuals registry, customers registry, and so on), objects (active equipment registry, network service registry), and documents (registry of contracts, registry of price specifications and so on).
You can access registries from the main menu. Registry pages have both common boxes and specific ones for a chosen type of subjects, objects, or documents. Each registry has a header:

Use Add  to create a new entry in the registry.
Searching Within a Registry
The Filter tab allows you to specify search conditions which will affect the entries shown on the Results tab. You can specify search terms for one or several parameters common to all the subjects, for example:
-
by code or name;
-
by subject status (select all check boxes or none to get a list of subjects regardless of their status);
-
by period in which that subject was created (the Created box);
-
by user who added the subject in the system (the Author box).
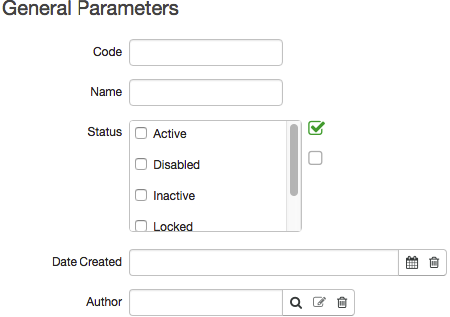
In addition, you can perform a search according to the characteristics of each type of subject, object or document. For example, for organizations by tax reference number, for individuals by surname, first name, and middle name, for customers by customer account number, and so on.
Another useful possibility is to use the filter to search for subjects and objects by their address:
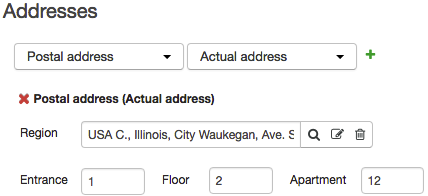
Choose the type and purpose of address, enter the details you want and click  . To remove a previously-added filter, click
  next to it.
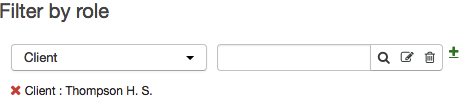
In document logs there is also a filter by role, which you can use, for example, to find documents relating to a particular client or service provider:
Saving Filter Settings
You can save your most frequently-used filter settings and choose them for further work with the registries. Filters are saved separately for each user of the system and cannot be viewed by other users.
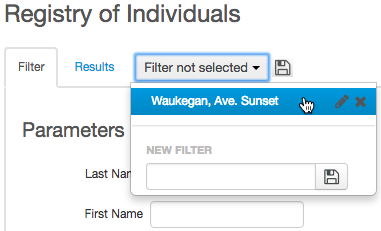
To create a filter, specify the search parameters you want and click  in the Choose filter list. Type the name under which you want to save your filter settings in the New filter box and click
  next to the name. The filter you have created appears on the list of saved filters and will be available for selection when is clicked. To rename a saved filter, click
  next to its name and to delete a filter, click
  .
.
If the @ symbol is used at the beginning of the filter name, for example @Active clients, this filter will be automatically selected when the register is opened. If there are several of such filters, the filter which is firs onet in alphabetical order will be opened. Use names with the @ symbol for the most frequently-used filters.
To change the settings of a saved filter, select it from the drop-down list, make the appropriate changes and click  next to it.
Viewing Filtered Results
Click Search at the bottom of the registry page to start searching. Use lists nearby to customize searching results.

Entries from the registry that match the search criteria are displayed on the Results tab:
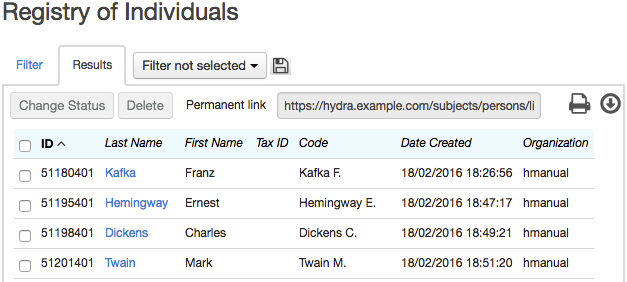
In a gray box there is a link to the search results, which can be accessed by any other user with sufficient rights. The Filter tab will be adjusted according to the search results.
The column name, which everything is sorted in accordance with, is in bold. The  and
and  signs indicate the direction of sorting — in ascending or descending order respectively. To change the order of sorting, click the column header.
Use check boxes in the first column to select one or several registry entries to change their status (the Change status button), delete them (the Delete button) or download information about them in printed form by clicking Print  and selecting the appropriate print template. In the latter case, the data of the selected entities, for example individuals, will be saved in separate files and the files themselves will be compressed into one zip-file. To select all the entities on the page, use the check box in the table header and to mark all the entities from the filtered results table, click Select all next to Print.
You can select which columns will be shown in the table by clicking  in the upper right corner. A window will open to customize the search results: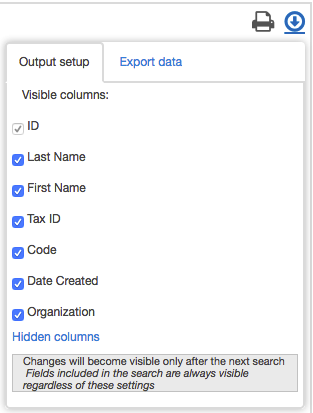
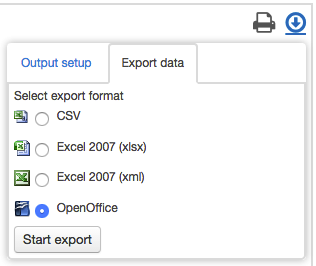
Using the Export data tab, you can save the search results in a convenient format for further work:
To go to the page of any entity in the results table, click the link in the corresponding row.