Creating and Setting Up Autonumberers
In this section
See also
Adding and Editing Autonumberers
To create a new autonumberer, open the corresponding tab (for example, Subjects) and click  Add autonumberer.
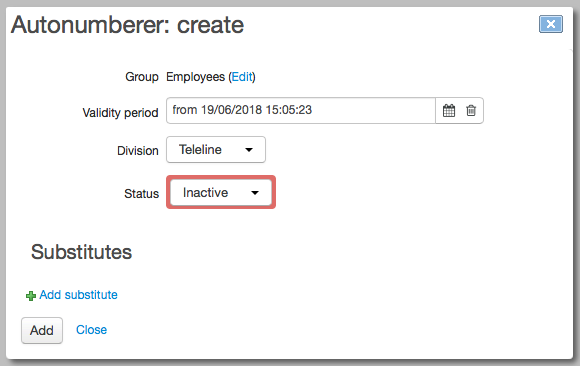
When creating an autonumberer for customers you need to specify the customer group for which it will be used.
For a document autonumberer, you need to specify a document type (select it on the Documents tab) and a workflow.
For objects, you can use autonumberers of two types: those for objects themselves and those for their components. Open autonumberer parameters to specify what a value is generated for — a code or an object name. In Object type, enter a group or an entry from the product catalog. Thus, the autonumberer will be used for objects created on the basis of these entries. In case autonumberers are set for both a child entry/group and a parent one, the first autonumberer will have the highest priority.
Enter Validity period and Division (if there are more than one), click Add. An autonumberer is created with the Inactive status. Next, you need to determine the autonumberer contents, i.e. a set of substitutes, and change its status to Active.
To edit an autonumberer, click in the corresponding row.
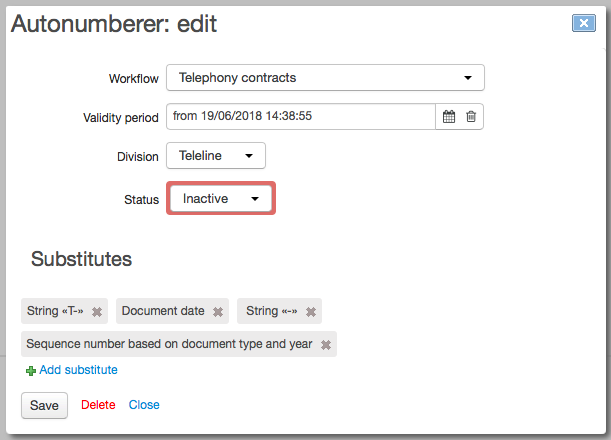
If the autonumberer has already been used to generate at least one number, it is marked with  and has most of the boxes blocked. Substitutes of such autonumberers cannot be further changed or deleted.
Substitutes and Their Settings
Substitutes are "building blocks" of an autonumberer. Autonumberers used for different entities have their certain sets of substitutes. Open an autonumberer to set up its substitutes.
The order of autonumberer's substitutes determines the order of substitute values within a generated number.
Depending on the type of a returned value, substitutes can be numerical, string, date and those returning reference values. Each type uses its own settings.
Substitute Type |
Available Settings |
|---|---|
|
|
Transliteration — transforming a string into Latin letters.
|
|
|
|
A reference data which values a substitute takes (only user reference data can be used), and settings that are available for the String substitute type. |
Adding and Editing Substitutes
To add a new substitute, click Add substitute in the Substitutes section, select a substitute from the list and click Add substitute.
Confirm adding the substitute by clicking Add substitute.
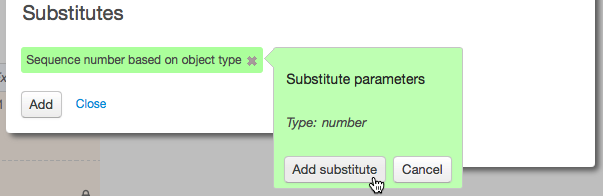
After the substitute is added, click it to open its settings.
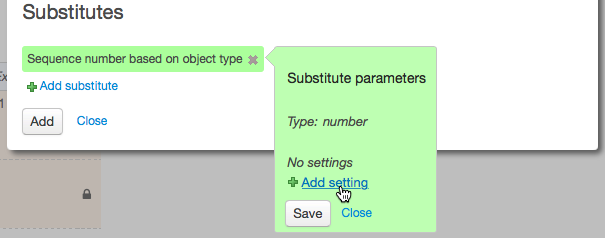
Click Add setting to see the list of available settings. Choose the necessary one and click Add setting.
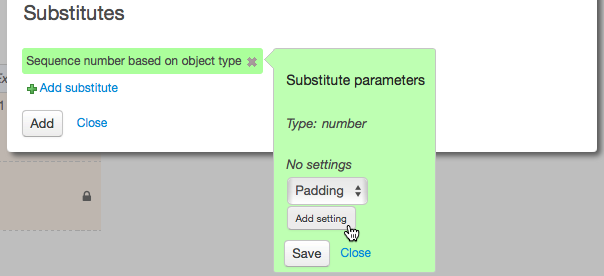
See the parameters of the chosen setting (if there are any).
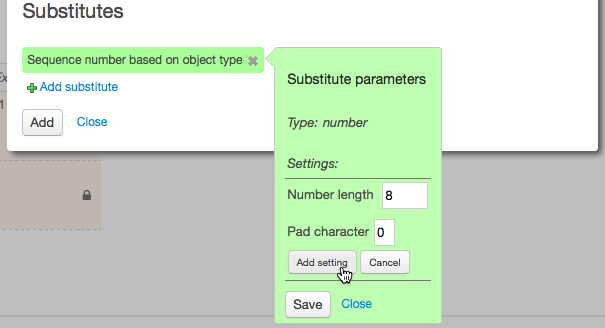
Configure parameters and click Add setting. If necessary, repeat the above steps to add more substitute settings. Finally, click Save.
Add all necessary substitutes to the autonumberer (new ones are highlighted in green) and click Save.
Click a substitute to edit its settings: use  to change setting parameters or click
  to delete a setting.
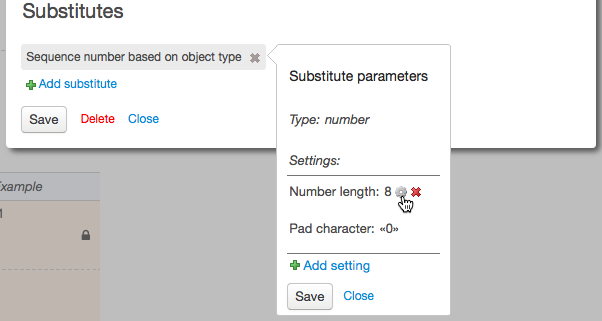 s
s
Click next to a substitute to delete it.